I make frequent use of virtualized environments for testing and proof of concept work. One of the many great features of virtualized environments is that I do not have to start from scratch every time. I build base systems with the configured OS and any necessary software. Using these base systems I can spin up a new machine and get to the interesting work quickly.
The cloning processing is not as refined on VirtualBox as some of the other virtualization offerings but once you done it a few times you find that is not so painful of process to prevent frequent use. This document will detail the cloning process on a Windows 7 64bit host cloning an Oracle Linux 5 64bit guest. The version of VirtualBox used is 4.0.4 R70112.
Create a New Virtual Machine
First we will create a new VM with no virtual disk. On the VirtualBox Manager Dialog click the New icon on the button bar to start the virtual machine creation wizard.
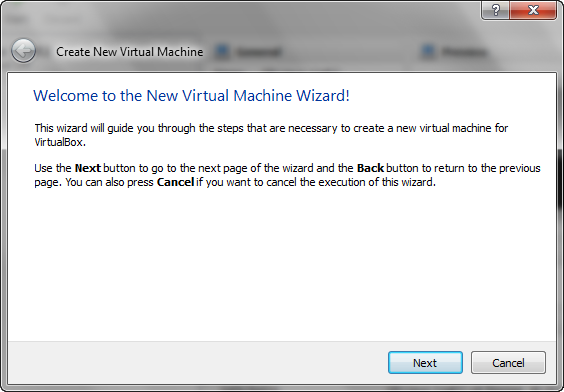
Click the Next button on the wizard welcome screen to start the process.
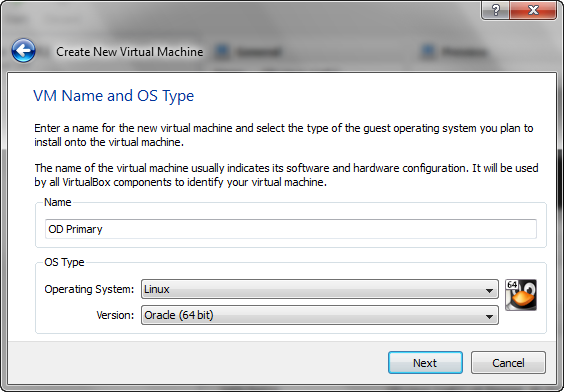
On the VM Name and OS Type dialog provide a name and select and Operating System. Insure that the selected Operating System matches the OS on the virtual drive cloned later in the document. Click the next button to continue.
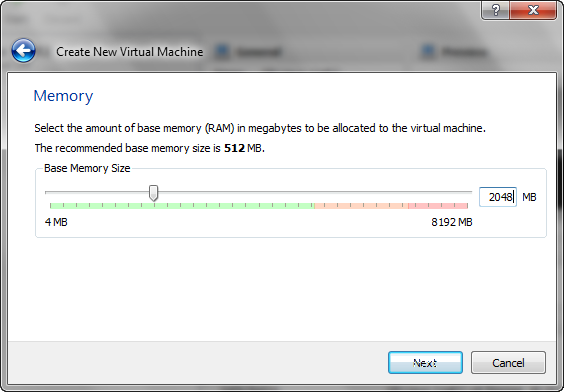
Provide a base memory size for this VM and click the Next button to continue.
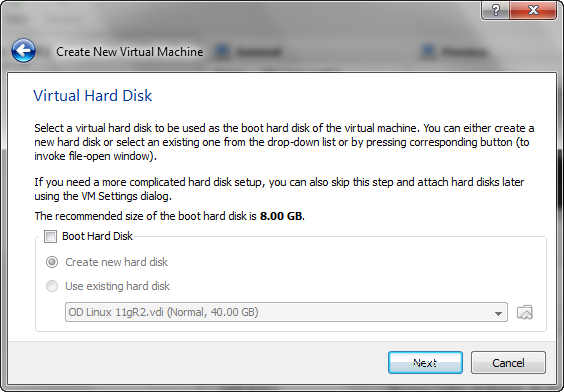
On the Virtual Hard Disk dialog un-check the Boot Hard Disk checkbox. We do not want to create a virtual hard disk at this time as we will attach the clone disk created later. Click the Next button to continue.
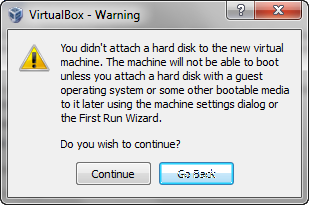
A warning will appear after clicking the Next button because we did not create or attach a virtual hard disk on the last step. Click the Continue button.
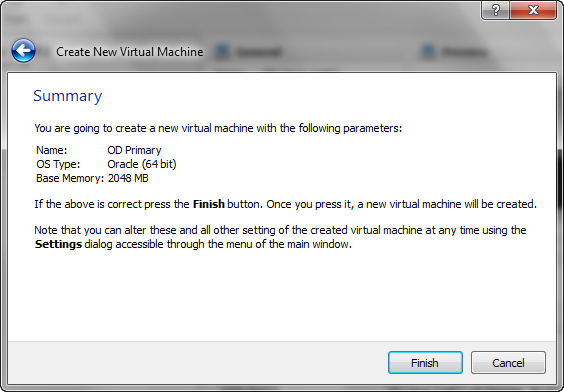
The last dialog is the Summary Dialog click the Finish button to complete the New Virtual Machine Wizard.
Cloning the Virtual Hard Disk
The VirtualBox installation includes a program called VBoxManage. VBoxManage is a command line interface into the VirtualBox virtualization engine. Using VBoxManage you can perform any task that can be done through the user interface including many more functions that are not yet included in the interface. You can find more information on VBoxManage and it usage in Chapter 8 of the VirtualBox user’s guide. For the purpose of the cloning a VM we will only need to use the clonehd command.
C:\Users\ejenkinson>"C:\Program Files\Oracle\VirtualBox\VBoxManage.exe" clonehd
Usage:

VBoxManage clonehd          <uuid>|<filename> <outputfile>
                            [--format VDI|VMDK|VHD|RAW|<other>]
                            [--variant Standard,Fixed,Split2G,Stream,ESX]
                            [--existing]


C:\Users\ejenkinson>
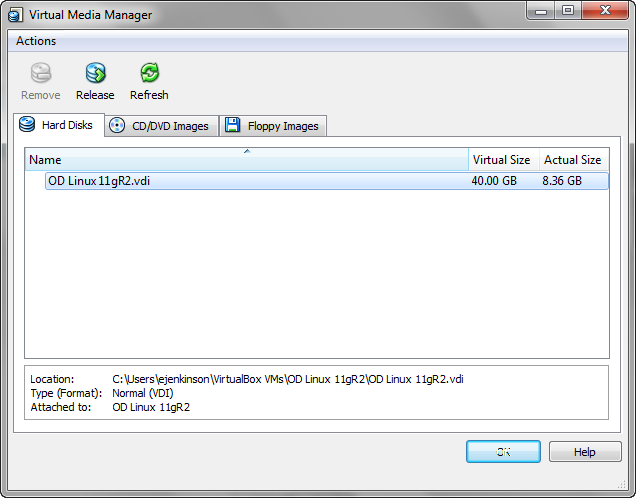
All we will be required to provide to clonehd is just the source drive image and destination drive image including paths. You can find the location of the drive by opening the Virtual Media Manager found under the File Menu.
The Virtual Media Manager is where manage virtual hard disks as well as CD/DVD and floppy images. On the Hard Disks tab, select the disk you would like to clone. Once selected information about the drive such as the location, type and machine it is attached to is displayed at the bottom of the dialog.
Now that we know the name and path of the source virtual hard disk we can now use VBoxManage to clone the hard disk. In this situation we want to put the virtual hard disk clone in directory for the virtual machine we created earlier. Remember on Windows if you the paths have spaces you have to enclose the path in double quotes. Below is the output of executing the clonehd command of VBoxManage.
C:\Users\ejenkinson>"C:\Program Files\Oracle\VirtualBox\VBoxManage.exe" clonehd "C:\Users\ejenkinson\VirtualBox VMs\OD Linux 11gR2\OD Linux 11gR2.vdi" "C:\Users\ejenkinson\VirtualBox VMs\OD Primary\OD Primary.vdi"
0%...10%...20%...30%...40%...50%...60%...70%...80%...90%...100%
Clone hard disk created in format 'VDI'. UUID: fbcf1060-d494-4560-b1fb-e3bb385fd320

C:\Users\ejenkinson>
The speed of the clonehd command depends on the size of the source virtual hard drive so expect to wait a while for the command to complete. Once the clonehd command finished we can now attach the cloned virtual disk to the virtual machine created earlier.
Attaching the Cloned Drive to a Virtual Machine
Back on the VirtualBox Manager dialog select the virtual machine that you will use to attach the virtual disk and click the Settings icon the button bar.
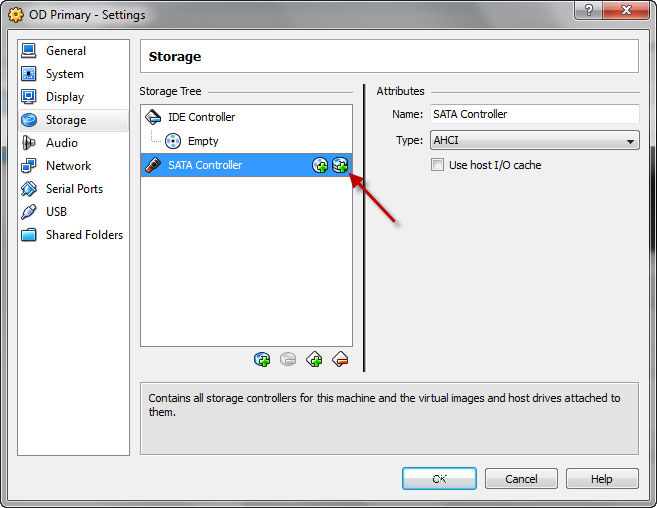
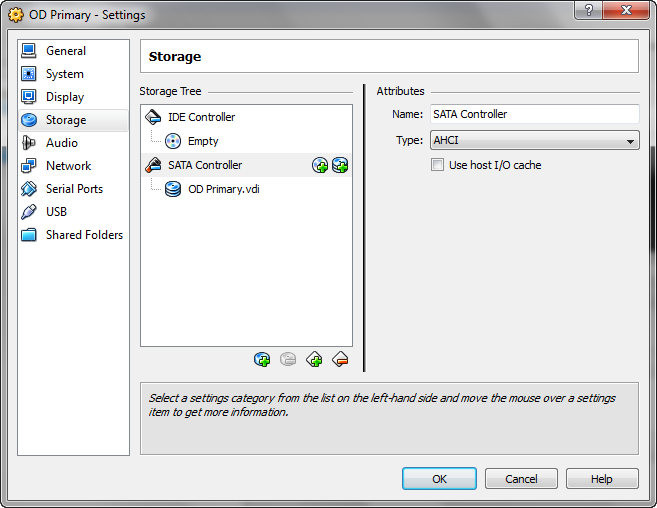
On the Settings Dialog select Storage from the list on the left and select SATA Controller under the Storage Tree. With the SATA Controller highlighted click the second icon on right to add a hard disk.
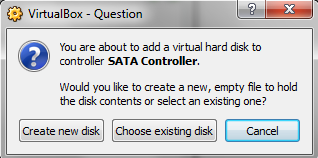
Once you click the Add Hard Disk button a dialog will appear asking if you wish to create a new disk or choose and existing disk.
Click the Choose existing disk button to continue.
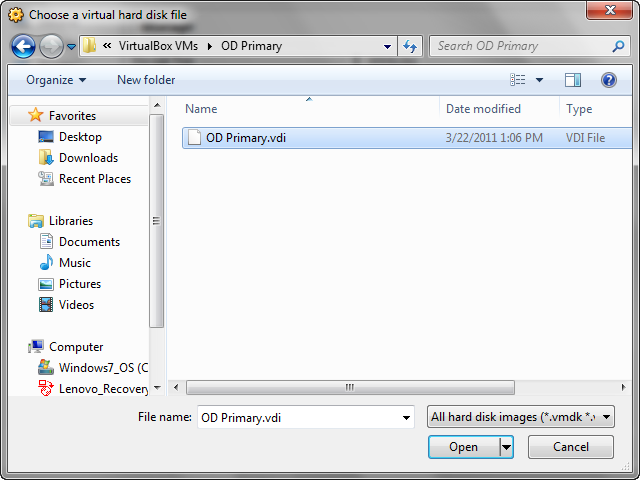
Browse to the location of the cloned disk, select the disk name in the list and click the Open button to continue.
Back on the Settings dialog you will see that the drive has been attached to the SATA Controller.
Click the OK button to close the Settings Dialog.
With cloned virtual disk attached to the new VM you have a successfully cloned your original VM. Keep in mind that all of the settings as well as the machine name in this new VM is the same as the original. You will need to make the necessary changes so this new machine will not have any conflicts with existing machines.




Nice tutorial. Thanks!
Hello Kurt,
I am glad you found the post helpful.
Thank you for visiting Oracle Distilled.
Thanks for this. I’m setting up an Android development virtual machine. I had a base VM that I wanted to start from.
Hello Sir , Its a nice tutorial .
I have tried it for testing oracle rac .but i see that the clone
machine when i test it tells me it is not proper linux.
while original is treated as 64bit oracle linux , the clone is
not treated on par. Question i wanted to ask was if u create a clone HD
does it defaut to settings of 32bit linux ?? thank you for your help.
kishan kant
Hello Kishan,
When cloning a hard drive in VirtualBox we have to remember we are cloning the Hard Drive and not the Virtual Machine. The drive itself has makes no distinction between 32bit and 64bit.
It is left to us to know what OS is installed on the cloned hard drive and whether it is 32bit or 64bit. I employ a naming convention for virtual hard drives that will be used for boot devices. In the naming convention I include OS version and whether it is 32bit or 64bit in the file name.
Hello,
I have cloned a VirtualBox machine, which runs Ubuntu
11.04 32-bit as Guest OS.
I now wish to transfer it to a new host machine running Windows Vista 32-bit. I’ve transferred the .vdi file and adjusted the name and memory. However when I boot it, the options to choose the Linux version came up: Ubuntu, with Linux 2.6.38-10-generic, Linux 2.6.38-10-generic(recovery mode) , Previous Linux versions, Memory test. Once I chose Linux 2.6.38 a black screen just appears with an underscore at the top.
What should I do to get it to run? I don’t have my original machine near me now so I can only work with my .vdi image.
Thank you.
Hello George,
Just so I understand, you have copied the VDI file from one machine to another and have created a VM with the specifications to match the OS on the VDI and are having difficulties booting the copied VDI.
One suggestion would be to make a clone of the VDI on the new machine so a new UID would be created on the new clone.
To avoid taking the extra space and time you can also use the following:
After performing either of the above attach it to a new VM that meets the guest OS requirements.
One question: Are you using the same version of Virtual Box on each machine?
Hello,
Well on my new host machine I installed the latest VirtualBox.
On my old host, I think I had the second latest version because it
did not have the “Clone” button under the tab. Should I try installing
that version on my new host?
Thank you.
Also, should I upload the Ubuntu .iso to the IDE controller along with
uploading the .vdi to the SATA controller?
I tried using ‘creating’ another vdi using ‘sethduuid’ command but
it is still giving me a black screen with an underscore at the top left
corner. Now my original host is a 64-bit Windows 7 machine. However, I am
sure the Ubuntu guest I downloaded is the 32-bit. What should I do?
Hello George,
You can use a 32bit guest on a 64bit host. You just need to make sure that the guest is configured for a 32bit OS. You do not need to attache the iso to the CD port, but you do need to attach the vdi to the SATA port.
Eric Jenkinson
I am still getting the black screen. What should I do?
My original host machine has an Intel i5 processor and my new host
a Intel Core 2 Duo. Could the difference in processors be causing the
issue?
Hello George,
The difference in processors between the two host machines should not make a difference. It is possible that VDI may have incurred some corruption in the transfer between the two machines.
One option would be to create a new Ubuntu guest and install the OS on this new guest. After the installation is complete you can add the VDI from the old machine to another SATA port on the new guest. You can then try mounting the old VDI under the new guest. If you can successfully mount and read the VDI you can transfer any data you need to the new guest.
Eric Jenkinson
What is the difference between adding the VDI to SATA port and mounting
the VDI? How do I mount the VDI?
Hello George,
Adding the VDI to an open SATA port on the VM (Using the GUI or the command line) is the virtual equivalent of adding a drive on physical machine. Once added you can boot the new VM and issue the Linux mount command to access the drive.
Eric Jenkinson
Hello sir,
I am using virtualbox on ubuntu, actually i am using virtualbox’s command line interpreter. So i wanted to know whether it is possible to clone an os as it is through CLI. If yes, will you provide me the procedure for it? thank you in advance
Hello Anumpam,
The easiest way to clone a VM via the command line is to use the VBoxManage command clonevm found in the VirtualBox 4.1 and higher.
If you are using a version prior to 4.1, the process would be similar to what has been outlined in this post but instead of creating the the new VM via the VirtualBox Manager GUI you would use VBoxManage createvm command to create the VM XML file followed by one or more executions of the VBoxManage modifyvm command to configure the VM settings such as Guest OS, number of CPUs, Memory, network, etc.
Eric Jenkinson
I have the same black screen issue and I’m going out of my mind. I am trying to move an Ubuntu virtual machine from a 64bit Windows 7 host to another 64bit Windows host – with exactly the same version of Virtual Box 4.1.4. Why is this so hard?
I am only a poor scientist with a deadline and not an expert computer scientist. Please help!