Database Configuration Assistant (DBCA) provides a graphical interface for database creation and database configuration. This document will detail the creation of a database using the Database Configuration Assistant. The screen shots in this document were taken from an Oracle 11gR2 install on Oracle Enterprise Linux.
On UNIX systems Database Configuration Assistant can be started with ORACLE_HOME/bin/dbca. On Windows systems Database Configuration Assistant can be found in the Start menu under All Programs | Oracle Home | Configuration and Migration Tools.
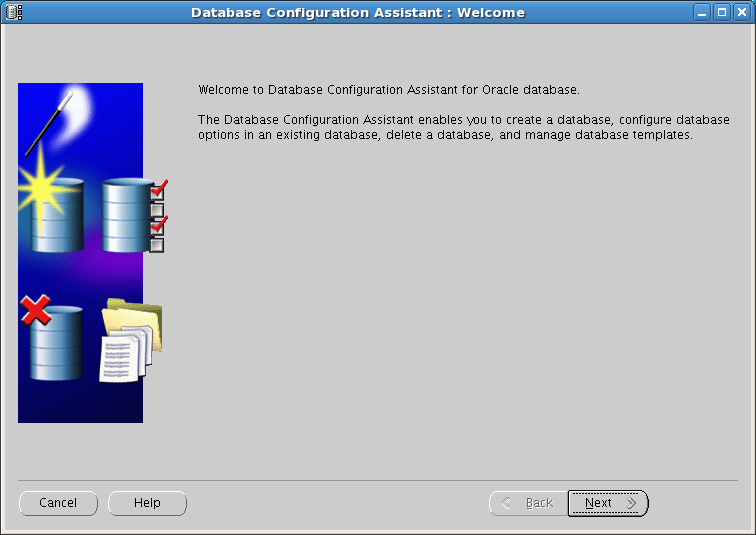
After the initialization process completes you will be presented with the Welcome screen. Click the Next button to continue.
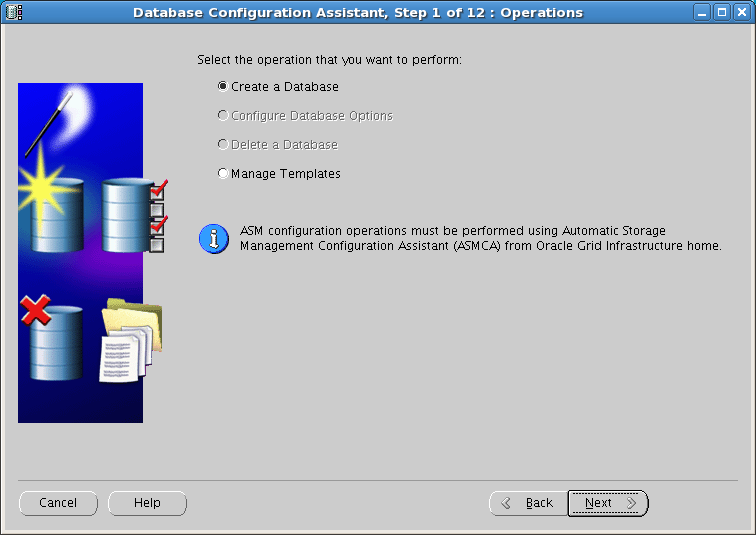
On the Operations dialog you have ability to Create, Configure Database Options and Delete a database. If DBCA is started on server with no databases configured and registered only the Create Database and Manage Templates options will be available.
Templates are a way to standardize and automate the creation of databases. DBCA includes three templates by default. Ensure that the Create Database option is selected and click the Next button to continue.
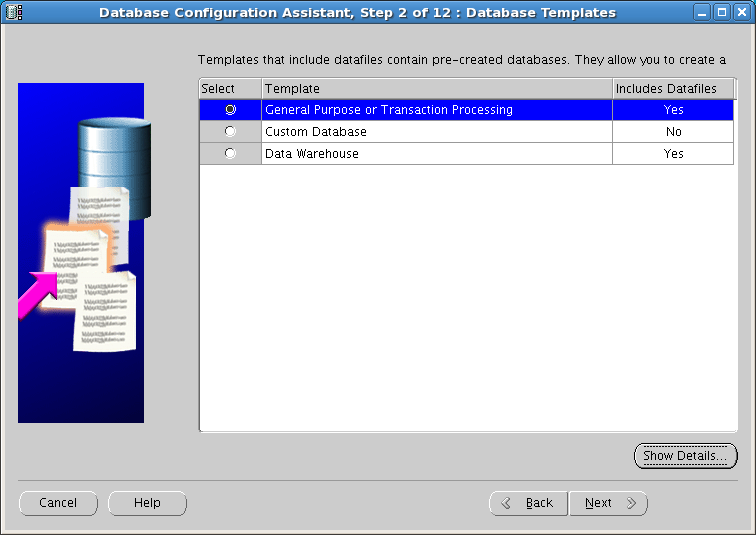
On the Database Templates dialog you have the ability to choose from three default templates. The General Purpose or Transaction Processing template builds a database with configurations geared for OLTP type of access and the Data Warehouse template builds a database with configurations geared toward data warehouse activities. The third option, Custom Database is provides the most flexibility in database configuration and will be the template used in this document.
You can inspect the configuration options by selecting a template and then click the Show Details… button. A new dialog window will appear detailing the Oracle components to be installed, character set, initialization parameters and file names and locations.
Ensure Custom Database is selected and click the Next button to continue.
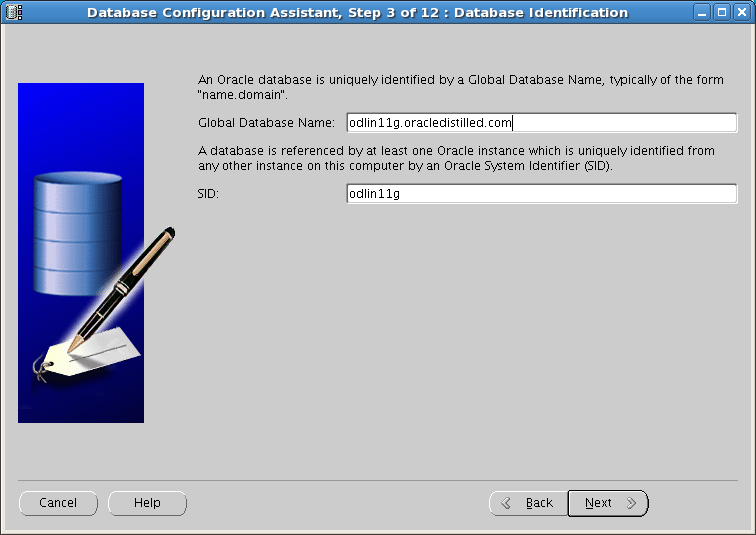
The Global Database Name is in the format < database name >.< domain name >. The database to be created in this document is odlin11g and the domain name is oracledistilled.com resulting in a Global Database Name of odlin11g.oracledistilled.com. The SID is generally the first 13 characters of the database name.
Provided a Global Database Name and SID then click the Next button to continue.
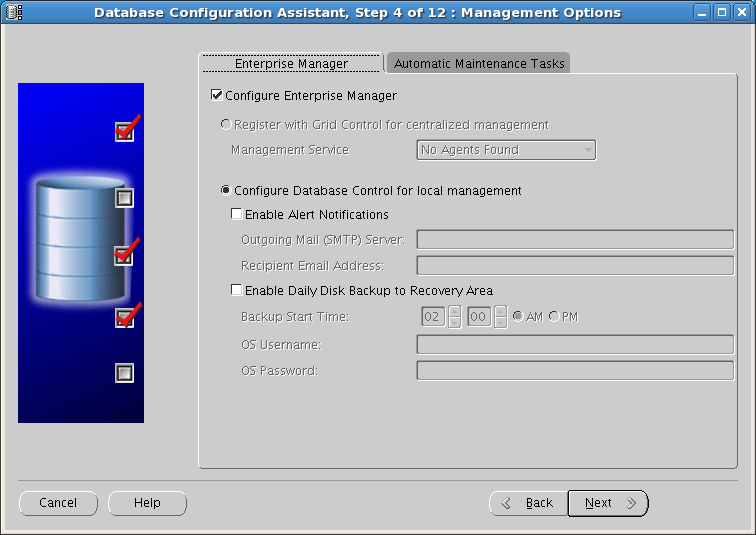
On the Management Options dialog you have the choice between using Enterprise Manager Database Console or registering the new database with Grid Control. An Oracle Enterprise Manager Grid Control Agent must be installed and running in order to register the database with Grid Control.
In this example the agent is not installed so the only option available is to use Database Control for local management. When using the Database Control you can choose to enable alert notification and schedule daily disk based backups. For this example we are not enabling the alert notifications or the daily backups.
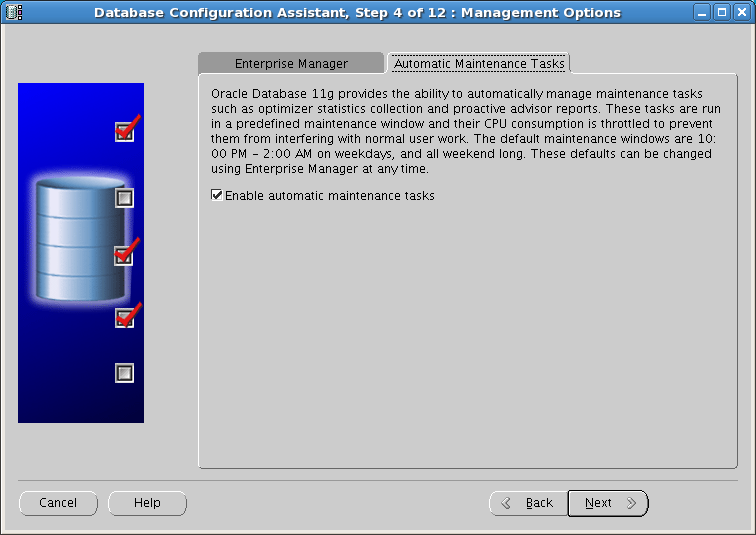
Click the Automatic Maintenance Tasks tab.
Under the Automatic Maintenance Task tab you have the ability enable or disable database maintenance jobs such as statistics collections, SQL tuning recommendations, As stated in the dialog these jobs are scheduled to run in default maintenance windows between 10pm and 2am weekdays and all weekend long.
After making any desired changes click the Next button to continue.
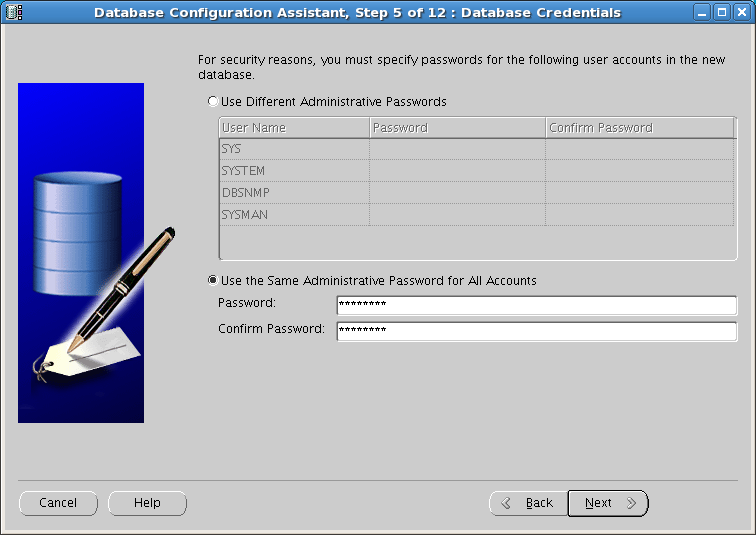
On the database credentials dialog you have the ability to provide a distinct password for the administrative users or use one password for all administrative users.
You might get a warning on the passwords chosen if they do not meet the following format: at least 8 characters in length, at least 1 upper case letter, at least 1 lower case letter and at least 1 digit. Enter the passwords and click the Next button to continue.
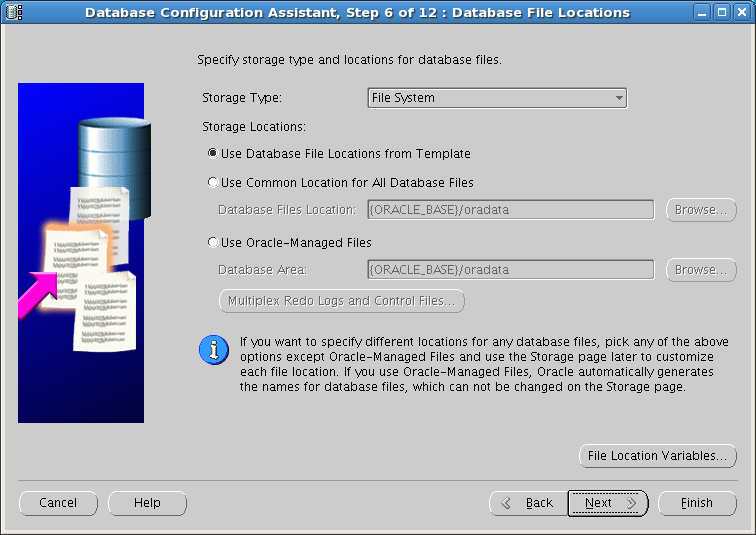
On the Database File Locations dialog you have the option of storing the files on a file system or ASM. ASM is only available as an option if an ASM instance is present on the server.
For the Storage Locations there are three options: Locations stored in template, Common location for all database files, Oracle-Managed files.
Locations from Template– DBCA will use the directory information contained in the template.
Common Location for All Database Files– All database files will be stored in the location provided.
Oracle-Managed Files– All database files will be stored in a location provided. File naming, creation and deletion is handled automatically by the database. Using this option you can choose to multiplex the redo logs and control files.
The File Location Variables… button can be used view the values to be used for the variables {ORACLE_BASE}, {ORACLE_HOME}, {DB_NAME}, {DB_UNIQUE_NAME}, {SID}.
For this example the files will be stored on the file system using a common location for all files.
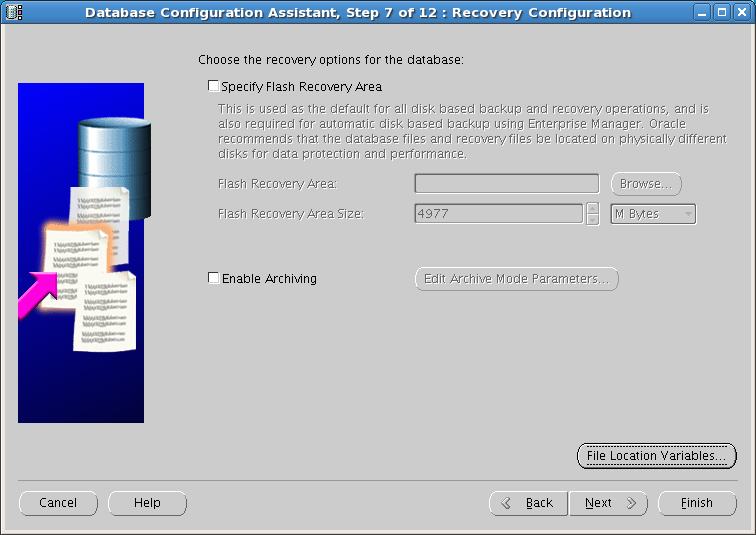
You can choose to enable the Fast (Flash) Recovery Area by providing a location along with a maximum size to be utilized by the Fast Recovery Area. The Fast Recovery Area is used to store and manage files related to backup and recovery of the database. The Fast Recovery Area is separate from the database files and is managed by the Fast Recovery Area Size.
If you choose to enable archiving you can click the Edit Archive Mode Parameters in which you enable automatic archiving, log file format and the destination in which to write the archive logs.
Click the Next button to continue.
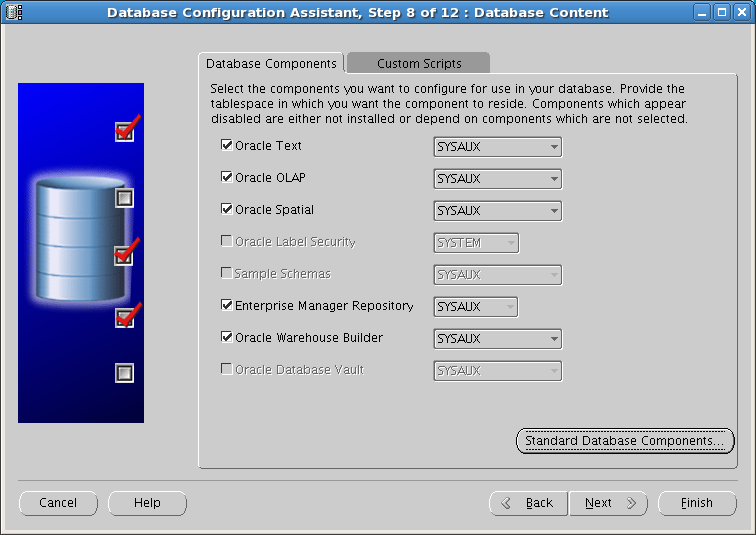
On Database Options dialog you can select database components and the locations in which to install them including creating a new table space if necessary. Note: If you are creating a database for production use you should only install options in which you have a license.
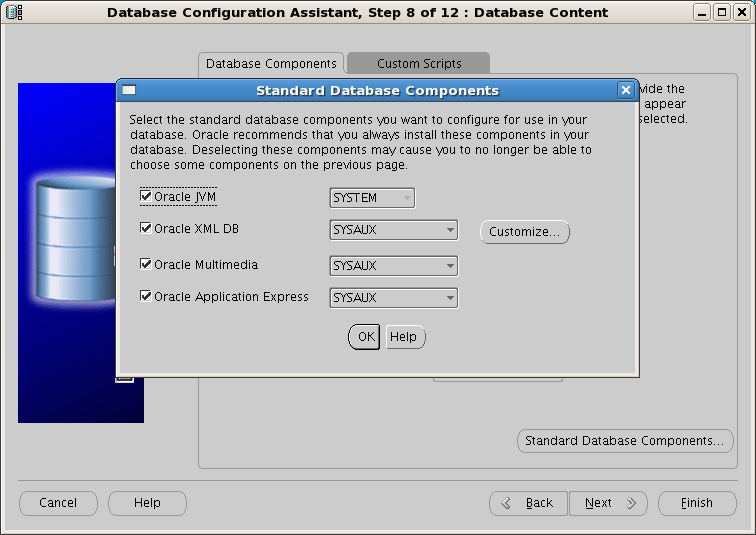
Click the Standard Database Components… button to change the install locations for components such as XML DB, Java Virtual Machine, Application Express and Oracle Multimedia.
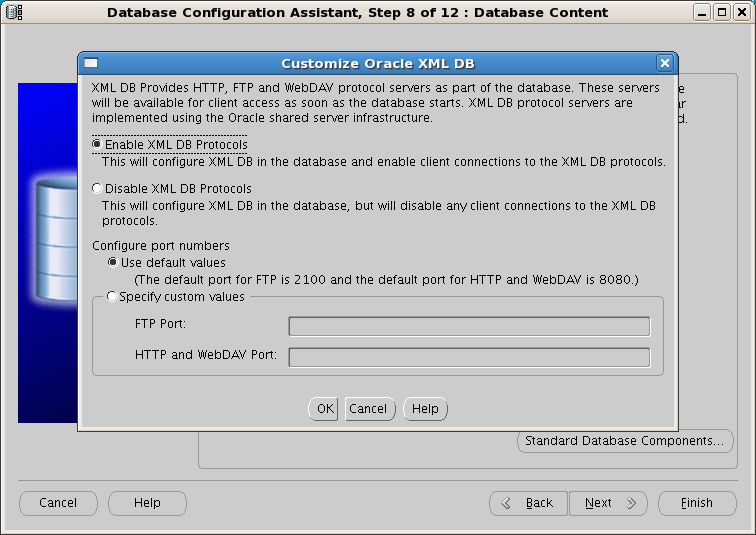
The XML DB option can be further customized by clicking the Customize… button.
Make any changes to the XML DB configuration and click the OK button to return to the Standard Database Components dialog. Click the Cancel button if you have no changes to make. On the Standard Database Components dialog click the OK button to go back to the Database Content dialog.
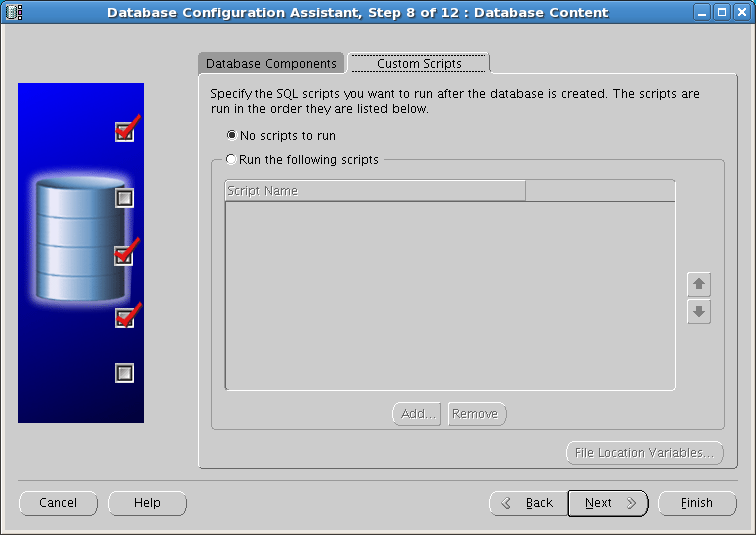
On the Database Content dialog click the Custom Scripts tab.
If you were to have any scripts that need to be executed after the creation of the database you can add them on this dialog. Note that the scripts run in the order listed. You can use the arrow buttons on the right to change the order of execution.
After making your changes click the Next button to leave the Database Content dialog.
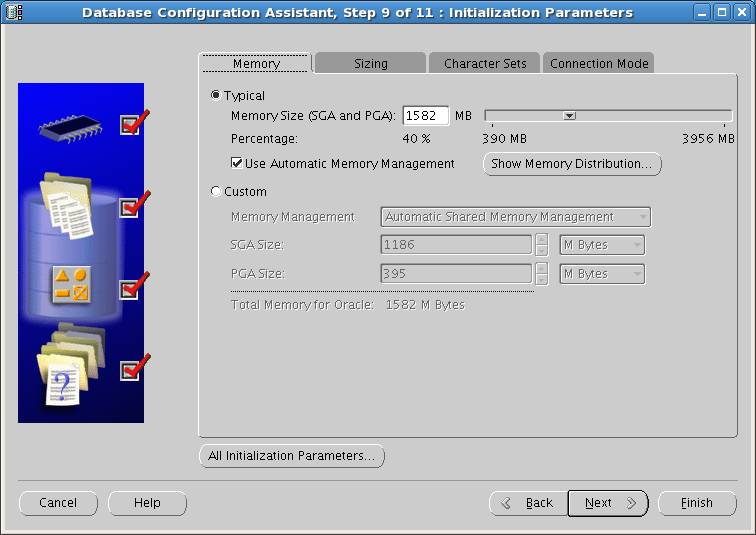
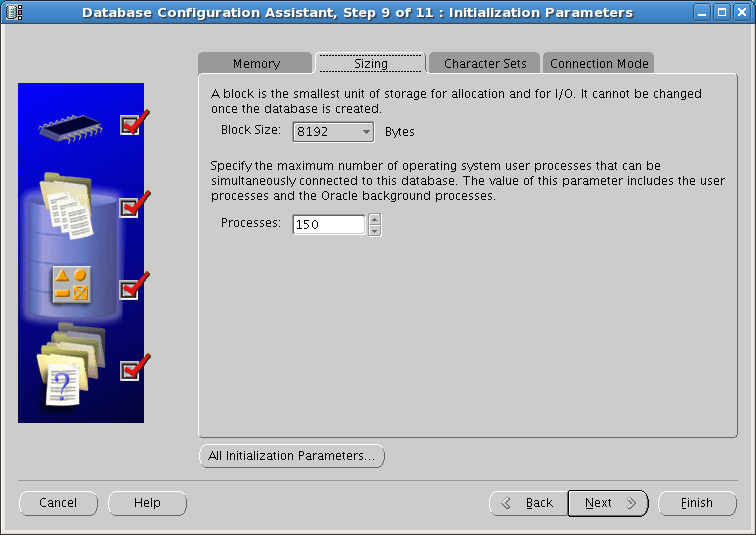
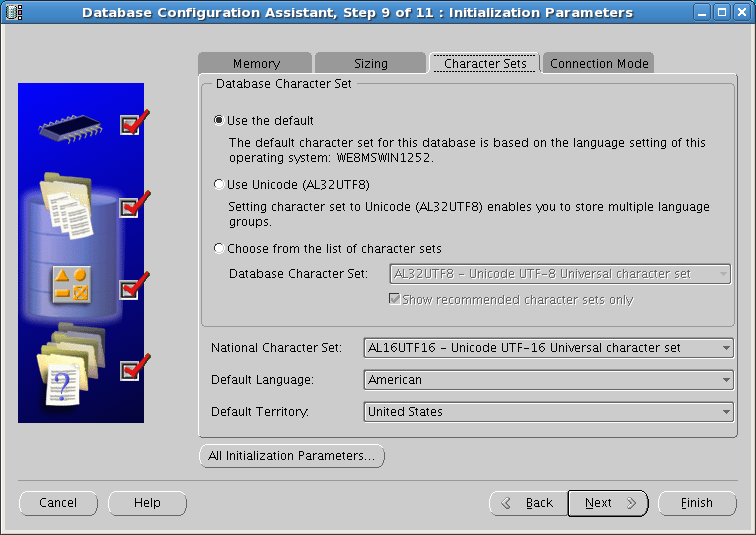
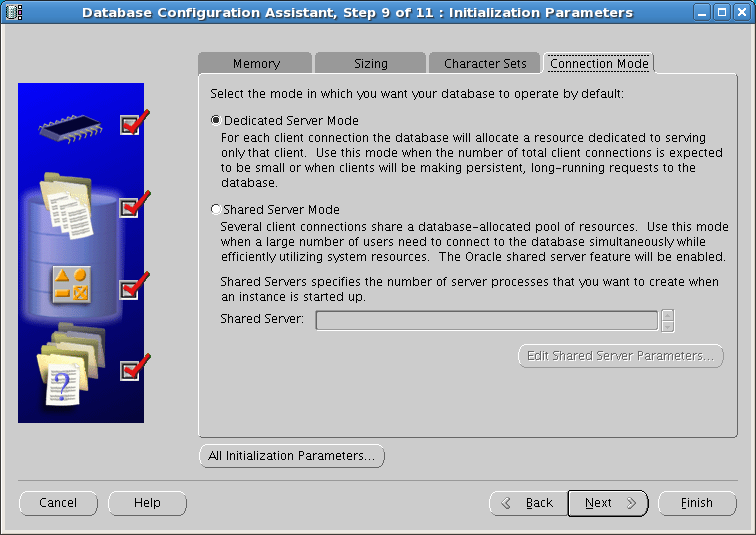
The Initialization Parameters dialog contains four sections: Memory, Sizing, Character Sets, Connection Mode.
Oracle 11g introduced Automatic Memory Management as means of further simplifying sizing of the SGA and PGA. Instead of providing values for the SGA and PGA you can provide one value that the instance will use to automatically adjust memory components in the SGA and individual PGAs as needed. Automatic Memory Management is selected by default.
If desired you can select the Custom option and choose Manual Memory Management.
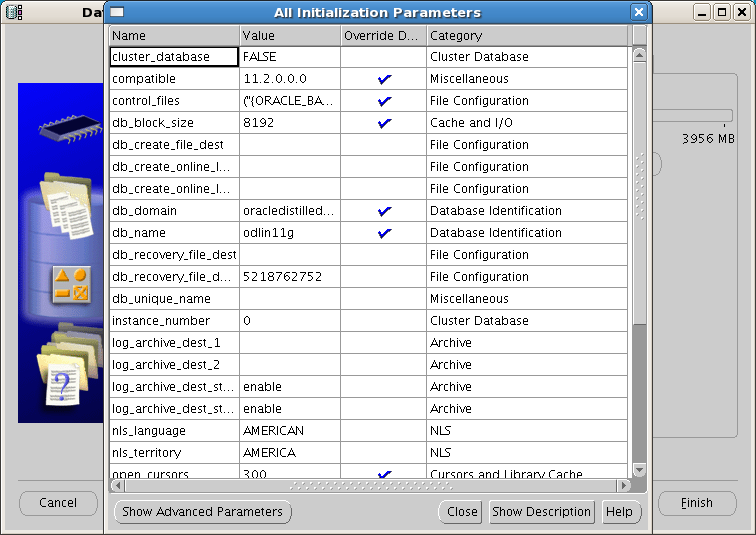
The All Initialization Parameters… button will bring up a window that list all of the initialization parameters. Using this screen you see all of the values to be assigned to the parameters as well as choose to override the values.
Click the Close button to close the Initialization Parameters window.
Click the Sizing tab
On the Sizing tab you can specify the block size and the maximum number for processes that can simultaneously connect to the database.
Click the Character Sets tab
The character set determines which languages can be represented in the database. The default character set is based on the language setting of the host operating system. You also have the choice between a Unicode character set or selecting a national character set.
Click the Connection Mode tab
On the Connection Mode tab you can choose between dedicated server mode or shared server mode. In dedicated server mode each user process has a dedicated server process. This mode is used in situations were the number of client connections is small or when clients typically make long running database requests. Dedicated connection mode is the default connection mode.
In a shared server connection mode client processes share a database-allocated pool of server processes. This mode is used in situations were the number of clients is expected to be high with typically small work loads. When selecting a shared server configuration you will need to provide the number of server process to create a database startup.
After making any necessary changes click the Next button to continue.
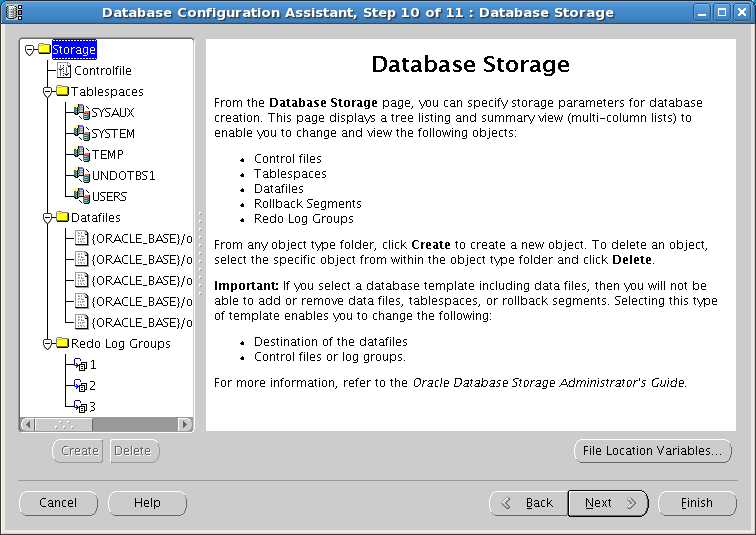
Database Storage
On the Database Storage dialog you can structure of the database by adding, removing or modifying control files, data files and online redo log groups. You can only make changes to the structure if you did not choose a pre-configured template.
Click the Next button to continue.
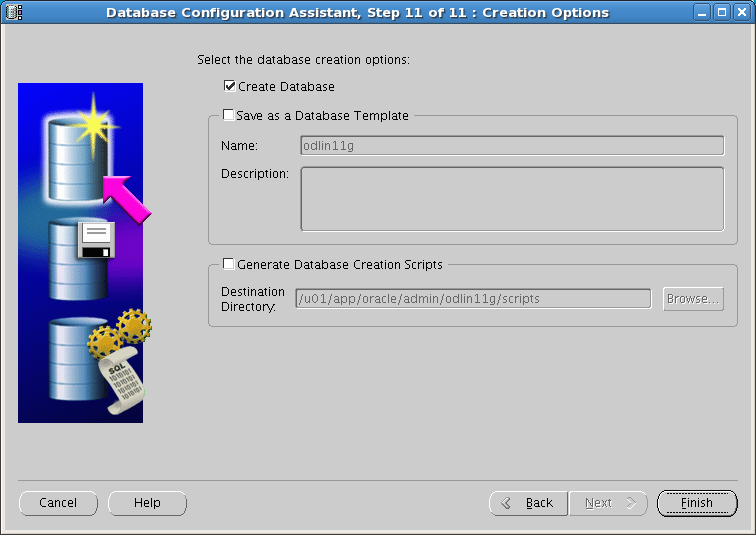
You have the options of creating a template and or generate database creation scripts. If you choose to generate a template it will be available for selection on future executions of DBCA. The custom scripts can be used to create a database with all the selections made during this run of DBCA.
Click the Finish button to create the database.
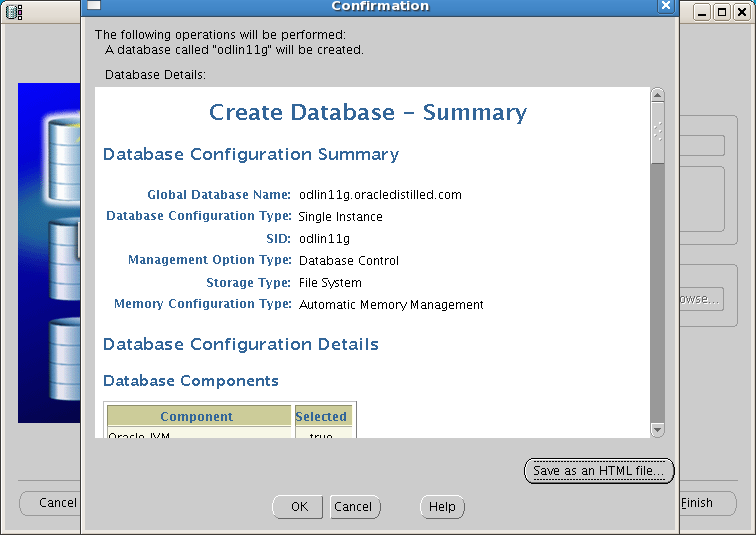
The Confirmation page detail all the choices made previously that will be used to create the database.
After reviewing the summary page if you find that you need to make changes click the cancel button to go back to the Creation Options dialog and use the back button to go back to the dialog in which you need to make changes, otherwise click the OK button to start the database creation.
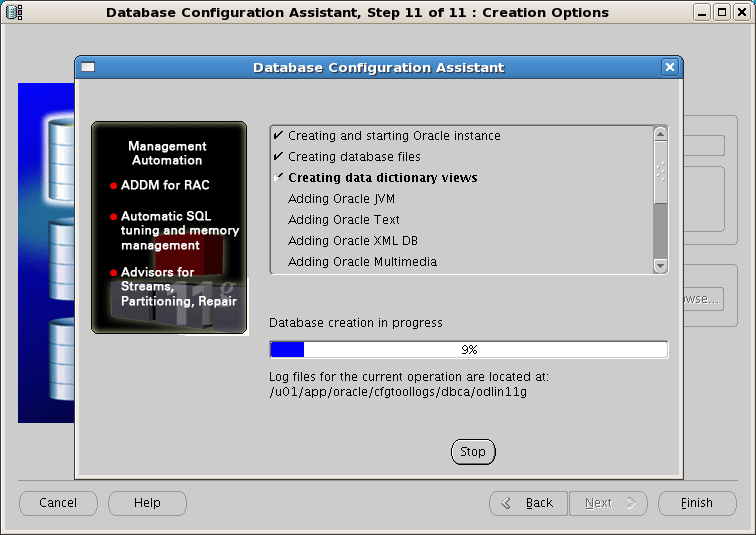
The progress dialog will detail the database creation process along with showing the percentage complete.
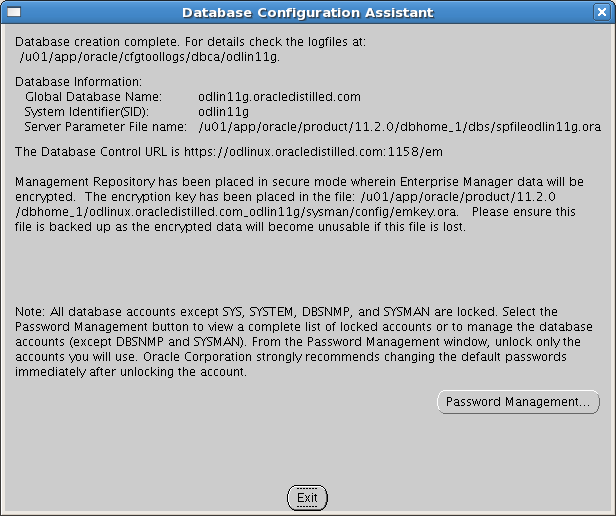
After the database creation is complete the last dialog will provide details such as the global database name, system identifier (SID) and the locations of the server parameter file and encryption key. Also provided on this dialog is the URL in which to connect to Oracle Enterprise Manager Database Console.

i was installing database configuration assistant and suddenly computer turns off how to resume the installation where it was left
I have checked your blog and i’ve found some duplicate content, that’s why
you don’t rank high in google’s search results, but there is a tool
that can help you to create 100% unique content, search for:
boorfe’s tips unlimited content